En encapsulant le tout dans une fonction et en ajoutant la gestion des paramètres permettant la saisie du nom de la nouvelle machine, la sélection du système d'exploitation à déployer et la sélection de la configuration matérielle, on obtient le résultat suivant :
Le script final

Import-Module Hyper-V
Write-Host « Import VM Guest Library… »
$vm_path = « D:\Images Virtuelles »
function Add-VMGuest([string]$vm_name, [string]$vm_size, [string]$vm_operatingsystem)
{
switch ($vm_size)
{
‘S’ { $vm_processor = 2; $vm_mem_minimum = 512MB; $vm_mem_maximum = 1GB; $vm_disk_size = 60GB; break }
‘M’ { $vm_processor = 4; $vm_mem_minimum = 1GB; $vm_mem_maximum = 4GB; $vm_disk_size = 60GB; break }
‘L’ { $vm_processor = 8; $vm_mem_minimum = 1GB; $vm_mem_maximum = 6GB; $vm_disk_size = 60GB; break }
}
switch ($vm_operatingsystem)
{
‘Windows7’ { $vm_iso = « C:\Images ISO\Windows\Windows 7 SP1 (x64-EN).iso »; $vm_edition = « Ultimate »; $vm_unattended = « C:\ImagesVirtuelles\Unattend\Win7_ult_x64.xml »; break }
‘Windows8’ { $vm_iso = « C:\Images ISO\Windows\Windows 8 Enterprise Trial 90d (x64-EN).iso »; $vm_edition = « Enterprise »; $vm_unattended = « C:\ImagesVirtuelles\Unattend\Win8_ent_x64.xml »; break }
‘Windows8.1’ { $vm_iso = « C:\Images ISO\Windows\Windows 8.1 Enterprise Technet (x64-EN).iso »; $vm_edition = « Enterprise »; $vm_unattended = « C:\ImagesVirtuelles\Unattend\Win8.1_ent_x64.xml »; break }
‘Windows2008R2’ { $vm_iso = « C:\Images ISO\Windows Server\Windows Server 2008 R2 SP1 (x64-EN).iso »; $vm_edition = « ServerEnterprise »; $vm_unattended = « C:\ImagesVirtuelles\Unattend\Win2008r2_x64.xml »; break }
‘Windows2012’ { $vm_iso = « C:\Images ISO\Windows Server\Windows Server 2012 Trial (x64-EN).iso »; $vm_edition = « ServerDataCenterEval »; $vm_unattended = « C:\ImagesVirtuelles\Unattend\Win2012_x64.xml »; break }
}
#Création de la VHD
New-Item « $vm_path\$vm_name\ » -ItemType Directory
C:\ImagesVirtuelles\Library\Convert-WindowsImage.ps1 -SourcePath $vm_iso -Edition $vm_edition -VHDPath « $vm_path\$vm_name\$vm_name.vhdx » -VHDFormat VHDX -VHDType Dynamic -SizeBytes $vm_disk_size -UnattendPath $vm_unattended
#Ajout du Kit d’outils AVAEDOS
$vkit_path = ‘C:\VirtualKit\AVAEDOS’
$vhd_path = Mount-VHD -Path « $vm_path\$vm_name\$vm_name.vhdx » -Passthru -NoDriveLetter
$vhd_path | Get-Disk | Get-Partition | Where-Object -Property PartitionNumber -eq -Value 1 | Set-Partition -NewDriveLetter M
Remove-Item M:\AVAEDOS -Confirm:$False -Force -Recurse
Copy-Item $vkit_path -Destination M:\ -Recurse -Verbose
$vhd_path | Dismount-VHD
New-VM –Name $vm_name -Path $vm_path –MemoryStartupBytes 1GB –VHDPath « $vm_path\$vm_name\$vm_name.vhdx » -SwitchName « AVAEDOS Network »
Set-VM -Name $vm_name -ProcessorCount $vm_processor -DynamicMemory -MemoryMinimumBytes $vm_mem_minimum -MemoryMaximumBytes $vm_mem_maximum -AutomaticStartAction Nothing
Start-VM -VMName $vm_name
}
Ce script peut ensuite être automatiquement déployé à chaque lancement de votre environnement PowerShell en ajoutant la ligne suivante dans votre fichier de profil (C:\Users\<utilisateur>\Documents\WindowsPowerShell\profile.ps1):
Import-Module C:\ImagesVirtuelles\Library\Script.ps1
A chaque lancement de l’environnement PowerShell en activant les privilèges administratifs, vous pourrez déployer tout un environnement simplement à l’aide des commandes suivantes par exemple :
Add-VMGuest AD-DC1 S Windows2012
Add-VMGuest EXCH-MBX1 L Windows2012
Add-VMGuest EXCH-MBX2 L Windows2012
Add-VMGuest EXCH-EDGE M Windows2008
Add-VMGuest CLI-WIN1 S Windows8.1
Téléchargez cette ressource

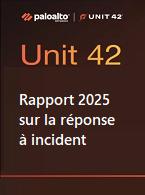
État des lieux de la réponse à incident de cybersécurité
Les experts de Palo Alto Networks, Unit 42 et Forrester Research livrent dans ce webinaire exclusif leurs éclairages et stratégies en matière de réponses aux incidents. Bénéficiez d'un panorama complet du paysage actuel de la réponse aux incidents et de sa relation avec la continuité de l'activité, des défis auxquels font face les entreprises et des tendances majeures qui modèlent ce domaine. Un état des lieux précieux pour les décideurs et professionnels IT.
Les articles les plus consultés
A travers cette chaîne
A travers ITPro
Les plus consultés sur iTPro.fr
- De la 5G à la 6G : la France se positionne pour dominer les réseaux du futur
- Datanexions, acteur clé de la transformation numérique data-centric
- Les PME attendent un meilleur accès aux données d’émissions de la part des fournisseurs
- Fraude & IA : Dr Jekyll vs. Mr Hyde, qui l’emporte ?
- Gestion du cycle de vie des outils de cyberdéfense : un levier de performance pour les entreprises